Loading game
Preparing player
Loading game
Ready to play
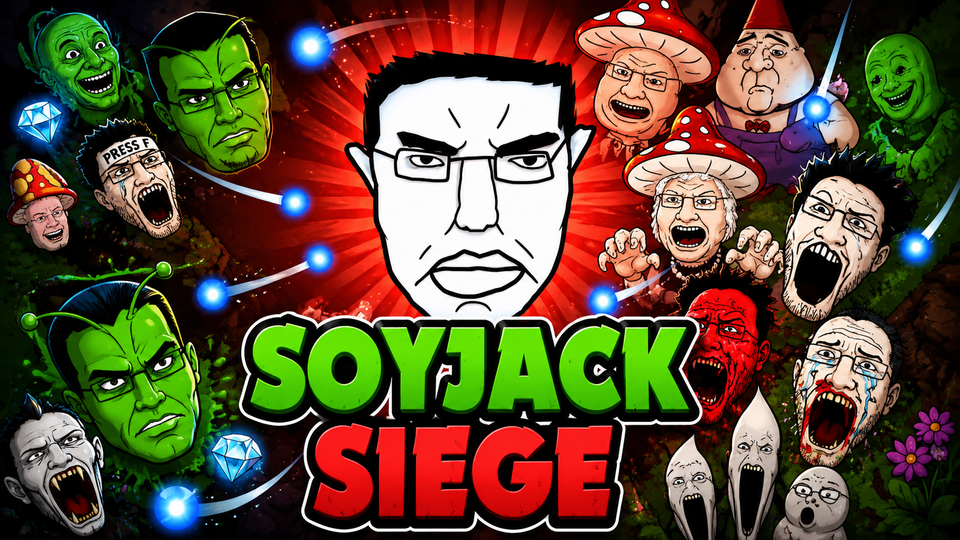
Play Soyjak Siege online for free. Survive massive enemy hordes, collect EXP, build powerful weapon combos, dodge bullet-hell bosses, and conquer 16 chaotic worlds.
Soyjak Siege is a chaotic top-down survival shooter where one fighter stands against enormous waves of meme-powered enemies. Take control of Chud, enter the strange world of Shartaia, protect the remaining Gem, collect experience from defeated enemies, build increasingly powerful combinations of weapons and abilities, and survive long enough to confront the forces of Dr. Soystein.
The opening waves may look manageable, but the battlefield quickly transforms into a bullet-filled survival challenge. Enemies begin surrounding you from every direction, stronger variants join the swarm, safe movement space becomes smaller, and massive bosses introduce attack patterns that can cover large portions of the screen.
Winning is not only about dealing more damage. Movement, positioning, upgrade synergy, crowd control, health management, and understanding boss patterns become increasingly important as each run progresses.
Your main objective in Soyjak Siege is to survive enemy waves, collect experience, strengthen Chud, defeat powerful bosses, and continue progressing through the different worlds of Shartaia.
Enemies continuously enter the battlefield and move toward your position. Keep moving so the swarm cannot completely surround you while your weapons eliminate nearby targets.
Defeated enemies drop experience resources. Collect enough EXP to level up and choose another upgrade for your current build.
Upgrades can improve weapons, increase damage, strengthen defensive capabilities, provide utility effects, or unlock additional abilities depending on the options available during the run.
As the wave count increases, stronger enemies and larger groups begin appearing. Eventually you encounter powerful bosses whose attacks require careful dodging and pattern recognition.
The basic gameplay loop is:
Controls can vary slightly depending on the browser version you are playing.
Regardless of the exact control scheme, the core strategy remains the same: keep moving, avoid enemy contact, collect experience, and continuously improve your build.
Soyjak Siege begins with relatively small groups of enemies, giving you enough space to understand your movement and starting attacks.
That safety does not last.
Every surviving wave increases the pressure. More enemies enter the arena, stronger variants begin appearing, and large groups can quickly close every escape route if you remain in one location for too long.
Your first priority should therefore be survival rather than chasing every enemy for additional damage.
Remaining stationary is one of the easiest ways to become surrounded.
Enemies approach from multiple directions, so even an apparently safe location can become dangerous within seconds.
Keep moving through open areas and constantly check whether your current path still leaves enough room to escape.
Movement is effectively another defensive statistic. A powerful build cannot help if the entire swarm reaches your character at once.
Open space gives you options.
When several enemies begin approaching from one direction, a clear area behind or beside you provides somewhere to retreat.
Avoid moving directly toward corners or sections where enemies can block every exit.
Whenever possible, stay in areas where you can change direction without immediately running into another group.
Being completely surrounded is one of the most dangerous situations in Soyjak Siege.
Do not wait until the enemy circle has already closed before trying to escape.
Watch which side currently contains the smallest concentration of enemies and move toward that opening before it disappears.
Breaking through a thin part of the swarm is much easier than trying to escape after every direction becomes blocked.
Instead of running randomly across the map, try moving around the outside of large enemy clusters.
This technique can encourage opponents to follow similar paths and group together.
A concentrated swarm is easier for area-of-effect weapons to damage than enemies scattered across the entire battlefield.
Controlled circular movement can therefore improve both survival and offensive efficiency.
Kiting means moving away from enemies while your attacks continue damaging them.
It is one of the most reliable survival techniques against large groups.
Maintain enough distance that enemies continue following you without reaching your character.
As they form a group behind you, your weapons can repeatedly damage the front of the swarm.
Constantly moving in one direction can eventually create another problem.
You may reach an area where there is little room to continue while the entire swarm follows from behind.
Instead of waiting until you become trapped, begin changing direction while enough space still exists.
Always consider where your current movement will place you several seconds later.
Enemy eliminations provide the experience needed to strengthen your character.
Collecting EXP fills your level progression and eventually gives you another upgrade choice.
These upgrades are essential because enemy strength increases continuously.
If you stop collecting experience for too long, your build may fall behind the difficulty curve even if your movement remains excellent.
Experience is valuable, but survival remains more important.
A large pile of EXP surrounded by enemies may look tempting, but moving directly into the swarm can end the run before you collect enough to benefit.
Wait until the group moves away or circle around and approach the resources from a safer direction.
Progression matters only while your character remains alive.
One effective strategy is to pull enemies away from dropped experience before collecting it.
Move around the arena until the swarm follows you toward another section, then loop back toward the resources.
This creates a safer collection window while keeping enemies grouped together behind you.
Each level-up gives you another opportunity to improve your build.
Upgrade decisions become increasingly important because every choice influences how your character performs during later waves.
Instead of selecting upgrades randomly, think about what your current build already does well and what problem is most likely to end the run.
Strong Soyjak Siege builds are created by combining upgrades that complement one another.
For example, one weapon may provide excellent area damage while another handles dangerous individual targets.
A defensive upgrade can give you enough survivability to continue benefiting from several offensive improvements.
The goal is to create a complete build rather than simply collecting unrelated bonuses.
Spreading every upgrade across completely unrelated weapons can reduce your overall effectiveness.
When one weapon or ability already works well with your current strategy, strengthening it further may create a more powerful result than constantly adding new low-level options.
Focus enough resources on your strongest systems while still covering important weaknesses.
Maximum damage looks attractive, but a completely fragile character can lose immediately after one positioning mistake.
Pure defense creates the opposite problem: enemies survive too long, allowing the battlefield to become overcrowded.
A reliable build normally requires enough damage to control enemy density and enough defense or mobility to survive unavoidable pressure.
Crowd control becomes increasingly valuable as enemy numbers increase.
Weapons that hit multiple targets, create large attack zones, pierce through groups, or repeatedly damage clustered enemies can prevent the arena from becoming completely overwhelmed.
Late-game survival often depends more on removing large groups efficiently than dealing extreme damage to one ordinary enemy.
Area damage is excellent against swarms, but bosses can require concentrated damage.
If your entire build focuses only on clearing weak enemies, a major boss may survive long enough to fill the arena with dangerous attacks.
Try to maintain at least one strong damage source capable of pressuring high-health targets.
Current versions of Soyjak Siege document roughly 24 different weapons.
Each weapon can offer another attack pattern, tactical role, or build opportunity.
Experiment with new equipment rather than assuming the first successful weapon should remain your permanent choice.
A weapon that feels weak alone may become extremely powerful when combined with the right upgrades.
Roguelike progression means different runs can provide different upgrade opportunities.
Instead of trying to recreate one exact build every time, adapt to the weapons and bonuses currently available.
One run may become focused on large area attacks, while another may produce stronger projectile damage, defensive effects, or spell combinations.
When one weapon becomes responsible for most of your damage, keep improving it whenever valuable upgrades appear.
Increasing its effectiveness can prevent enemy health from scaling faster than your offensive output.
Do not allow your primary attack to remain weak while the battlefield becomes dramatically more dangerous.
Different attack patterns solve different problems.
A close-range circular attack can protect your immediate space while a ranged projectile damages enemies farther away.
A piercing attack can punish lines of enemies, while an area attack performs better against dense clusters.
Combining complementary attack patterns can make your build much more flexible.
Soyjak Siege includes spells and other special abilities that can supplement your normal weapons.
These can provide useful battlefield effects when ordinary attacks are not enough.
Use spells strategically instead of treating them as decorative additions.
A strong spell can help clear a dangerous wave or create enough space to escape from a near-surrounded position.
Consumables can provide temporary advantages or emergency support.
Because limited-use items are generally more valuable during difficult sections, avoid wasting them when your normal build is already controlling the battlefield comfortably.
Save important resources for boss encounters or waves where enemy density suddenly increases.
Health recovery opportunities are limited enough that unnecessary damage can become expensive.
Do not deliberately trade health for small amounts of EXP or minor enemy eliminations.
Every hit reduces your margin for error during the harder waves still ahead.
Avoiding damage is often more valuable than dealing a little additional damage yourself.
Unless your build specifically benefits from close combat, maintaining distance gives you more reaction time.
Enemies standing directly beside Chud can deal damage before you have enough room to reposition.
Keep a safety zone around your character whenever possible.
Traditional defensive statistics are useful, but your movement can prevent damage entirely.
A successful dodge costs no health.
This is particularly important against bosses whose attacks can deal much more damage than ordinary enemies.
Never depend entirely on your health bar to absorb attacks that can be avoided.
Do not focus exclusively on the enemies closest to Chud.
Look at how the entire battlefield is developing.
If one side is becoming extremely crowded, begin moving toward another area before that group completely closes the route.
Good arena awareness prevents many difficult situations before they become emergencies.
Not every enemy creates the same level of threat.
Some may move faster, survive longer, or create attacks that restrict your available movement.
When your weapons allow target selection, concentrate on enemies whose presence makes positioning significantly harder.
Removing one dangerous target can create enough space to manage the rest of the swarm.
Running across the entire arena after one target can place you in a much more dangerous position.
Keep overall battlefield control as the priority.
If an enemy moves away while another large group is approaching, deal with the immediate pressure first.
Every wave increases the pressure on your build.
Enemy numbers rise, stronger variants appear, and the time available to comfortably collect experience becomes smaller.
The objective is not merely surviving the current wave. You also need to finish it with enough health and progression to handle what comes next.
Some transitions are much more dangerous than the waves immediately before them.
A new enemy type, miniboss, or boss can suddenly expose a weakness that was not obvious during normal combat.
Do not become complacent just because your build easily cleared several previous groups.
Continue strengthening your main damage and survival systems whenever useful upgrades appear.
Minibosses introduce stronger targets without completely replacing the normal enemy swarm.
This can create a difficult situation where you need to damage one powerful enemy while still controlling dozens of smaller threats.
Avoid becoming so focused on the miniboss that ordinary enemies surround you.
Continue moving and let your build gradually deal damage while you preserve safe space.
Boss encounters are one of the biggest difficulty spikes in Soyjak Siege.
These enemies do more than simply increase health and damage.
They introduce bullet-hell attack patterns that force you to read movement carefully and move through increasingly narrow safe spaces.
Enter boss encounters with as much health as possible and a build capable of dealing reliable sustained damage.
Most boss attacks become easier once you understand their structure.
Instead of trying to damage the boss at maximum aggression during the first seconds, watch how projectiles move.
Identify whether the attack creates lines, circles, rotating patterns, expanding zones, or other predictable shapes.
Once the pattern becomes familiar, finding safe routes becomes much easier.
During bullet-hell sequences, survival should become your first priority.
If your build includes automatic attacks, concentrate almost entirely on movement.
If manual aiming is required, do not sacrifice a safe dodge simply to maintain perfect aim for another second.
A living player can continue damaging the boss later.
Large panic movements can accidentally carry Chud into another projectile.
When the attack pattern creates narrow openings, use smaller corrections and remain inside the safe space as long as possible.
Only make larger movements when the entire pattern requires repositioning.
The boss itself can provide information about what attack is coming next.
Animations, movement changes, or positioning may indicate another projectile sequence is about to begin.
Recognizing the attack early gives you more time to move toward a safer part of the arena.
Boss projectiles become much harder to dodge when you have no movement space remaining.
Avoid staying permanently against the edge of the arena unless the attack pattern requires it.
Try to maintain enough room to move in more than one direction.
Open sections of the battlefield are generally safer because they provide more escape options.
When choosing between collecting a small amount of EXP near a crowded edge or moving toward a clear central route, the open space may provide much greater long-term value.
Positioning should always consider what happens if another large wave suddenly appears.
Current browser versions document sixteen different worlds across the Soyjak Siege adventure.
Progressing through these areas moves Chud deeper into Shartaia and closer toward Dr. Soystein.
Different regions can introduce new enemies, environments, bosses, and increasingly demanding survival conditions.
The world progression gives your upgrades a larger purpose than simply beating one endless score.
A build or movement strategy that works well in one region may become less effective in another.
Different enemy combinations can change which upgrades provide the greatest value.
Remain flexible and adapt instead of assuming one strategy should dominate the entire adventure.
Every upgrade decision should consider what currently creates the greatest danger.
If swarms overwhelm you, improve area damage.
If bosses survive too long, strengthen concentrated damage.
If your damage is already excellent but one mistake ends the run, choose survivability or movement upgrades.
The best upgrade is often the one that solves your current weakness.
Area-focused builds are especially effective during dense enemy waves.
Prioritize weapons and upgrades capable of damaging several targets simultaneously.
Then use your movement to group enemies together so those attacks receive maximum value.
This style can dramatically reduce the number of enemies occupying the battlefield.
A damage-focused build tries to eliminate targets before they have enough time to overwhelm your movement space.
Prioritize upgrades that strengthen your primary weapons and improve their ability to defeat high-health enemies.
Remember to include enough crowd control so ordinary swarms do not become impossible to manage.
Defensive upgrades increase the amount of pressure you can survive.
This style can work well when you already have enough automatic damage but frequently lose from unavoidable hits.
Do not take defense as permission to stop dodging.
The best defensive build combines stronger survivability with disciplined movement.
Movement improvements can become extremely valuable during bullet-heavy stages.
Additional speed or utility effects can make it easier to escape swarm formations and reposition during bosses.
However, moving faster also requires more precise control.
Use mobility to create space rather than simply racing around the arena without a plan.
Many strong runs use a hybrid strategy.
For example, you might combine:
A flexible build provides solutions to more battlefield situations.
Standing still lets enemies surround you much faster.
Avoid corners and locations where the swarm can block every escape route.
Do not run directly through a dangerous group just because many experience drops are visible.
Choose upgrades that improve systems already working together rather than selecting everything randomly.
Large enemy groups become one of the biggest threats later in the game.
Avoid unnecessary contact because recovery opportunities can be limited.
Observation and positioning are often more important than attacking constantly.
Begin moving toward open space before enemies completely close your route.
Your build needs to scale quickly enough to match increasingly durable enemies.
Use the upgrade choices you actually receive instead of depending entirely on one predetermined build.
Long survival begins with movement discipline.
Stay in areas with multiple escape routes and continuously rotate around enemy groups instead of allowing yourself to become trapped between several swarms.
Collect EXP whenever the battlefield provides a safe opening and choose upgrades that improve your ability to control increasingly large groups.
Maintain enough defensive capability to survive occasional mistakes and learn boss attack patterns rather than trying to defeat every major enemy through raw damage alone.
Defeating more enemies naturally creates more EXP opportunities.
Area-damage upgrades can therefore accelerate progression by clearing larger groups efficiently.
However, do not sacrifice survival while collecting the drops.
Use movement to pull the swarm away from accumulated experience and return when the area becomes safer.
Watch the entire battlefield instead of concentrating exclusively on nearby enemies.
Identify where enemy density is increasing and move toward the more open side early.
Circle around large groups rather than running directly through them.
Once every direction becomes crowded, even a strong movement upgrade may not provide enough space to escape.
Spend the opening part of the fight learning the boss's attack pattern.
Keep moving and prioritize safe positioning while your weapons gradually deal damage.
During dense bullet patterns, use small controlled movements and avoid trapping yourself against arena boundaries.
Once the attack ends or creates a large opening, reposition and continue applying pressure.
Boss fights reward patience much more than reckless aggression.
Before selecting an upgrade, identify your current weakness.
Ask yourself:
Choose the upgrade that solves the most important current problem.
Look for attacks that complement each other.
A weapon that controls groups can create time for another high-damage weapon to eliminate stronger targets.
A defensive ability can keep you alive while a slower attack continuously damages enemies.
A movement bonus can make close-range weapons safer to use.
Think about what every new upgrade contributes to the whole build.
Do not run directly through the center of a large group.
Move around its outer edge and encourage enemies to cluster together.
Let area attacks damage the concentrated swarm while you preserve enough distance to stay safe.
If another group appears ahead, change direction before both formations connect and trap you.
Look for empty lanes between projectiles instead of watching every individual bullet.
Move toward the safe space using small corrections.
When the pattern begins shifting, locate the next opening early and reposition before your current gap closes.
Avoid sudden panic movements unless a large attack specifically forces you to cross the arena.
When playing a build where attacks activate automatically, treat movement as your main combat input.
Position enemies where your weapons can hit them efficiently and group swarms when your attacks benefit from area damage.
Because you do not need to constantly click to attack, devote more attention to dodging, EXP collection, and maintaining safe movement routes.
If your browser build uses mouse aiming and manual attacks, prioritize the most dangerous direction rather than constantly swinging your aim between individual weak enemies.
Fire into dense groups whenever your weapon can hit several targets.
Against bosses, keep your aim near the target while allowing movement and dodging to remain your first priority.
Keep surviving waves, strengthening your build, and defeating the major enemies blocking progression.
Each new world increases the challenge and introduces another stage of the journey toward Dr. Soystein.
Do not treat a failed run as wasted progress in terms of learning.
Every attempt teaches you more about weapons, enemy behavior, upgrade combinations, and boss patterns.
When a run ends, identify the exact reason instead of simply restarting with the same strategy.
Ask whether you:
Correcting one repeated weakness can make the next run dramatically stronger.
Soyjak Siege may be a shooter, but dealing damage is only part of the challenge.
The battlefield eventually becomes so crowded that positioning determines whether your build can continue functioning at all.
A perfectly upgraded weapon provides little value if Chud becomes trapped between enemies and projectiles.
Maintaining safe space should therefore remain part of every strategy.
Early upgrades may initially appear small, but several complementary bonuses can combine into a dramatic power increase.
A stronger weapon defeats enemies faster. Faster kills create more EXP. More EXP creates more level-ups. More level-ups create additional upgrades.
Strong early build decisions can therefore accelerate your entire progression curve.
Normal survival waves emphasize crowd control and movement around enemy groups.
Boss fights add another layer by filling the battlefield with projectile patterns.
You need to understand both types of pressure:
Mastering both is essential for deep progression.
The upgrade-driven structure gives Soyjak Siege strong replay value.
One attempt can become dominated by area damage, while another may produce a combination of powerful weapons, spells, movement bonuses, or defensive effects.
This encourages experimentation instead of repeating one identical strategy during every run.
Soyjak Siege combines top-down shooting, roguelike upgrades, wave survival, bullet-hell bosses, meme-inspired enemies, weapon progression, spells, consumables, and multiple worlds into a chaotic browser action game.
The basic objective is straightforward: stay alive and defeat everything trying to overwhelm Chud.
The deeper challenge comes from continuously adapting your build while maintaining enough space to survive.
Enemies become more numerous, bosses create increasingly dense projectile patterns, and every level-up forces you to decide which upgrade will provide the greatest long-term advantage.
With sixteen documented worlds, roughly two dozen weapons, multiple build possibilities, spells, consumables, and major boss encounters, the game provides much more progression than a simple endless shooter.
If you enjoy survivor-style games, arena shooters, roguelikes, bullet-hell combat, build experimentation, or chaotic meme humor, Soyjak Siege provides a fast gameplay loop where every upgrade can completely change how the next wave unfolds.
Enter Shartaia in Soyjak Siege and prepare for nonstop survival combat. Guide Chud through increasingly crowded arenas, defeat waves of bizarre Soyjak enemies, collect EXP, and choose upgrades that gradually transform a weak starting build into an overwhelming arsenal.
Unlock different weapons, combine attacks with spells and useful upgrades, maintain open movement space, and prepare for massive bosses that turn the battlefield into a screen-filling bullet-hell challenge.
Survive every wave, master your build, conquer all sixteen worlds, and continue the fight toward Dr. Soystein.
If you enjoy Soyjak Siege, try these similar survival, shooting, arena, wave-defense, and action games on YaloGames:
LIVE CHAT
No messages yet. Start the conversation.
Log in to join the chat.
Login